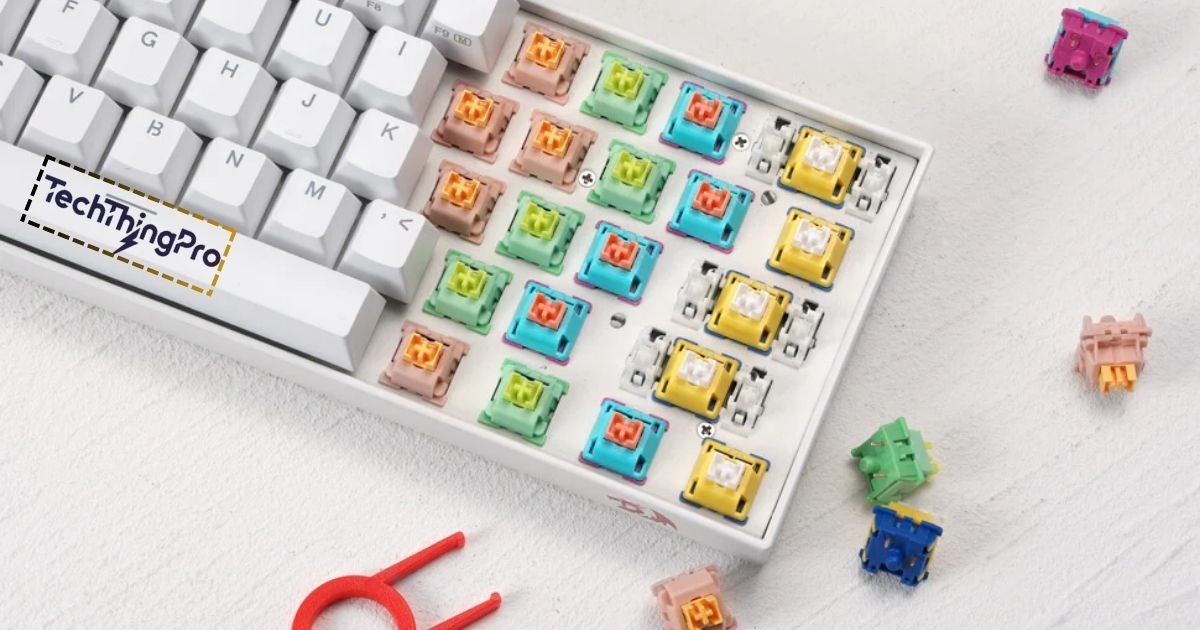
Replacing mechanical keyboard switches means swapping out the switches inside your keyboard. These switches control how the keys feel when you press them. Over time, they can wear out, or you may want to try different types for better performance.
In this guide, we’ll show you replace mechanical keyboard switches in 10 simple steps. From preparing your tools to reassembling your keyboard, we’ll walk you through each part of the process. With the right steps, you’ll have your keyboard working like new in no time!
List of Tools for Keyboard Switch Replacement
Before diving into the process, you’ll need some essential tools. These vary slightly depending on whether you’re replacing soldered keyboard switches or hot-swappable keyboard switches.
| Tool | Purpose |
| Soldering iron | To melt solder for switch removal. |
| Desoldering pump | To extract molten solder cleanly. |
| Keycap puller | To remove keycaps without damaging them. |
| Switch puller | For safely removing and inserting switches. |
| Tweezers for keyboard repair | To handle small components like pins. |
| Leaded solder | For reattaching new switches (easier for beginners). |
| Switch tester | To check switch functionality before installation. |
Having a clean workspace is also critical. Organize your tools and keep your keyboard repair workspace setup clutter-free. A well-lit area helps ensure you can see intricate details like switch pins and PCB-mounted switches.
How to Replace Soldered Keyboard Switches?
Step 1: Prepare Tools Needed and Workspace
Start by gathering all necessary tools. You’ll need a soldering iron, a desoldering pump, and replacement switches. Ensure your workspace is ventilated, especially when using solder. Arrange your tools for easy access. Proper setup minimizes errors during keyboard PCB repair.
Step 2: Unplug the Keyboard from Your PC
Safety should always come first. Unplug your keyboard to avoid potential short circuits or electrical damage. This also protects your PCB-mounted switches from accidental power surges.
Step 3: Disassemble the Keyboard
Remove the keycaps using a keycap puller. Once the keycaps are off, carefully open the keyboard case to access the PCB and backplate. Use tweezers to handle delicate components and avoid misplacing screws. Pay close attention to how parts align for smooth reassembly later.
Step 4: Activate Your Soldering Iron
Heat your soldering iron to the optimal soldering temperature, typically 350–400°C. A higher temperature can damage the PCB, while a lower one might not melt the solder effectively. For beginners, using soldering tips for beginners can make this step easier.
Step 5: Apply Leaded Solder to Your Solder Joints
Add a small amount of leaded solder to the solder joints. This creates a smooth surface for the desoldering technique. Leaded solder vs. lead-free solder debates often favor leaded solder for its ease of use in DIY repairs.
Step 6: Prepare Your Solder Sucker
Hold the desoldering pump close to the molten solder and activate it. This tool removes melted solder efficiently, allowing you to detach the old switch from the PCB.
Step 7: Extract Solder From Each Switch
Focus on one switch at a time. Apply heat with the soldering iron while using the pump to remove the solder. This ensures clean joints without damaging the keyboard PCB repair area.
Step 8: Detach Switches from the Plate and PCB
Once the solder is removed, gently pull the switch out of the plate and PCB. Use a switch puller if necessary and be careful not to damage surrounding components.
Step 9: Insert New Switches Into Plate and PCB
Align the pins of the new switch with the PCB. Proper mechanical switch alignment ensures a stable connection. Straighten bent pins with tweezers if needed before inserting.
Step 10: Solder Switches Onto the PCB
Secure the switches by applying fresh solder to the joints. A steady hand and patience are key to avoid creating cold solder joints. This step is crucial for a successful mechanical keyboard upgrade.
Step 11: Test Your Switches and PCB
Once soldered, use a switch tester or your keyboard’s testing software to ensure every switch is functioning properly. This step prevents reassembly issues caused by unresponsive keys.
Read 📖 More: GMMK Pro vs Keychron Q1: Which Fits Your Typing Style?
How to Replace Hot-Swappable Switches?
Replacing switches on a hot-swappable keyboard is simpler since no soldering is required.
Step 1: Remove the Keycaps
Use a keycap puller to take off the keycaps. Keep them organized to make keycap installation quicker later.
Step 2: Remove the Switches
Carefully pull out the switches using a switch puller. A gentle tug ensures you don’t damage the plate or pins.
Step 3: Swap in the New Switches
Align the new switches and press them firmly into place. Make sure they’re seated properly to avoid connectivity issues.
Step 4: Install the Keycaps
Reattach the keycaps, ensuring they align with the new switches. This final touch brings your keyboard back to life.
Common Mistakes of Switch Replacement
Mistakes can happen, but knowing the common pitfalls can save you from trouble.
Not Testing Switches Beforehand: Always check new switches with a switch tester to avoid installing faulty ones.
Poor Desoldering Technique: Rushing through solder removal can damage the PCB. Use proper desoldering techniques for clean joints.
Incorrect Switch Alignment: Misaligned switches can cause unresponsive keys. Double-check alignment before soldering or snapping switches into place.
Conclusion
Replacing mechanical keyboard switches might seem tricky at first, but with the right tools and guidance, it’s a skill anyone can learn. Whether you’re dealing with soldered keyboard switches or a hot-swappable keyboard, the process can improve your typing or gaming experience and extend your keyboard’s life.
Taking the time to follow each step carefully ensures success. With patience, you can fix unresponsive keys, upgrade to new switches, or enjoy a fully customized keyboard tailored to your needs. It’s rewarding and worth the effort!
FAQs
Can mechanical keyboard switches be replaced?
They can! Whether your keyboard has soldered or hot-swappable switches determines the method you’ll use.
How often should you replace keyboard switches?
Switches can last years, but heavy use or preference changes may prompt a replacement sooner.
Is it easy to replace keyboard switches?
Hot-swappable keyboards make the process simple, while soldered keyboards require more tools and patience.
Can you remove switches without a tool?
Tools like a switch puller or tweezers are essential for safely removing switches without causing damage.
How much does it cost to replace switches?
The cost varies based on the switches and tools required, typically ranging from $20 to $100 depending on your setup.

Lily Watkins is an experienced tech writer specializing in the latest trends and innovations. She is passionate about making complex technology accessible and shares her insights on TechThingPro.com.


