

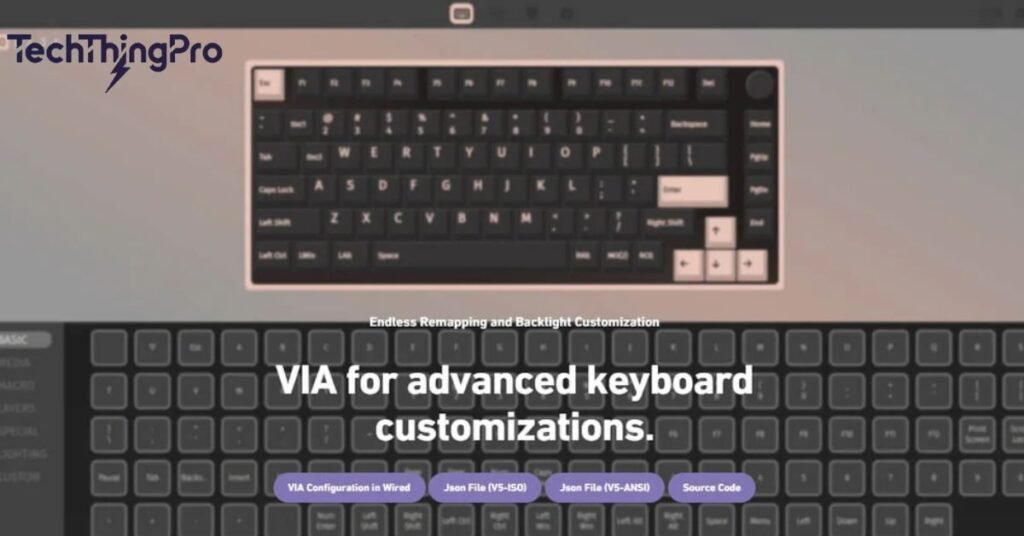
VIA is a powerful tool for customizing mechanical keyboards. It allows users to change key mappings, adjust lighting, and set up macros. This open-source software is user-friendly and perfect for beginners.
In this guide, you’ll learn how to use VIA step by step. We’ll cover everything from getting started to remapping keys and creating macros. By the end, you’ll be able to customize your keyboard with confidence and ease.
What is VIA?

VIA is a powerful, open-source keyboard configurator that allows users to customize their mechanical keyboards. Designed for compatibility with multiple keyboard brands, it helps users easily set up key mapping, lighting, and macros.
This software simplifies the process of creating complex keyboard setups, making it accessible for both beginners and advanced users alike. As an all-in-one configurator, VIA supports various keymap and layer settings on VIA-compatible keyboards.
Read 📖 More: What is a hot-swappable keyboard?
One of VIA’s best features is its versatility. Users can modify basic key assignments, create custom keyboard lighting in VIA, and set up multiple layers for different needs. For example, you can create a gaming layer with special macros or a work layer with shortcuts to frequently-used software.
VIA also lets you assign special functions like volume control or media playback, all through a simple JSON file import for VIA. With VIA, everything from Fn key mapping on VIA to toggle and momentary layers in VIA can be configured in a user-friendly environment.
How to Get on VIA?
You have two main options to get on VIA: the VIA web app and the VIA desktop application download. The web app, available at usevia.app, is often the best choice for beginners. It’s always up-to-date and doesn’t require any installation, which means you won’t have to worry about manually updating the software.
Just open it in a Chrome-based browser that supports WebHID, and you’ll be able to access all of VIA’s features without any hassle. If you prefer a standalone program, the VIA desktop application download is available on GitHub. The desktop version functions as a wrapper for the web version, providing potentially more reliable keyboard recognition.
While it does require an internet connection, it’s compatible with Linux, macOS, and Windows. To install, simply visit the VIA Releases page on GitHub, download the application, and follow the setup instructions.
How to Connect to VIA?
To begin using VIA, you’ll need to ensure your keyboard supports VIA keyboard compatibility and is connected via USB. Once connected, you can open either the web or desktop version of VIA. Connecting to VIA will allow you to import keymap files, configure layers, and adjust lighting settings. Here’s a step-by-step guide to get you started:
- Get the JSON File Corresponding to Your Keyboard
Many keyboards require a VIA JSON file download to fully customize key mapping. JSON files are often available on the keyboard’s product page or through a Download Center specific to brands like Akko or MonsGeek. Having the correct JSON file is essential, as it ensures VIA recognizes your keyboard’s layout and functions. - Click “SETTINGS” and Turn on the “Show Design Tab”
After opening VIA, navigate to SETTINGS and enable the Show Design Tab. This feature unlocks additional customization options, making it easier to adjust every detail of your keyboard layout. - Click “DESIGN” and Import the JSON File of Your Keyboard
Head to the DESIGN section to import your keyboard’s JSON file. Select “Confirm” and “Load” to start the import process. Once imported, VIA will recognize your keyboard’s specific layout, allowing you to configure keyboard key mapping with VIA. - Click “CONFIGURE” to Identify Your Keyboard in VIA
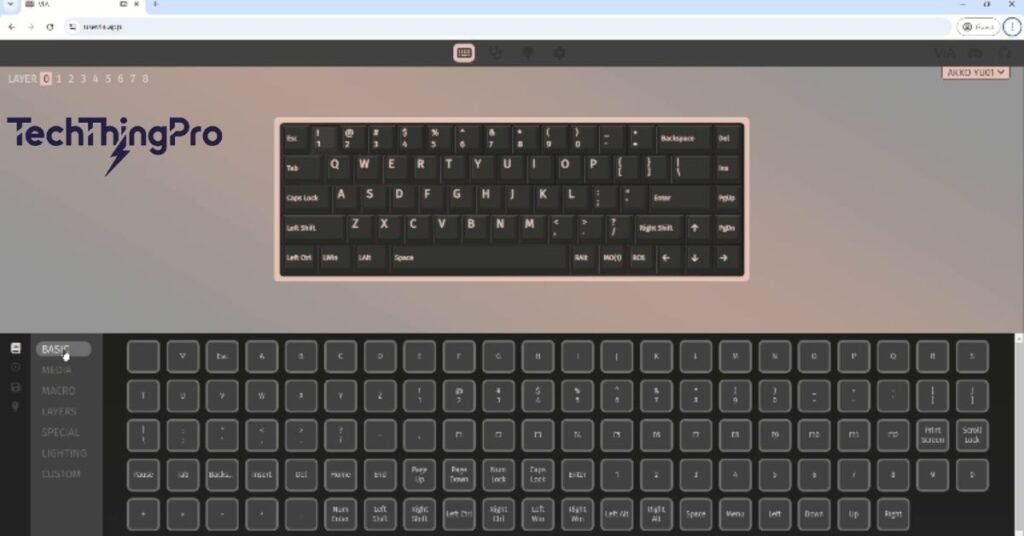
Once VIA identifies your keyboard, you’ll see a display of keymap layers and other customization options. This page divides functions into two parts: the upper section shows the active key layout, while the lower half offers a customizable function.
How to Remap Keys on VIA?
Remapping keys on VIA is a straightforward process that allows you to customize your keyboard layout according to your needs.
This feature is particularly useful for users who want to enhance their productivity or gaming experience by changing the default functions of certain keys. Here’s how to remap keys effectively:
- Open VIA and Connect Your Keyboard: Start by launching the VIA application on your device and ensure that your mechanical keyboard is connected. VIA should automatically detect your keyboard and load its layout.
- Select the Key You Want to Remap: On the main interface, you’ll see a visual representation of your keyboard. Click on the key that you wish to change. This action opens a menu where you can see the current function assigned to that key.
- Choose the New Function: In the pop-up menu, you’ll find a list of functions to choose from. These may include standard key functions (like letters or numbers), media controls (like play or pause), or even macros that you have previously created.
- Apply the Changes: After selecting the desired function, confirm the change. Your new key mapping will take effect immediately, allowing you to start using your keyboard with the new configuration.
- Save Your Keymap: It’s essential to save your configuration to avoid losing changes. You can usually do this by navigating to the “File” menu and selecting “Save Keymap” or a similar option.
- Test the New Mapping: Once you have remapped the keys and saved your settings, test the keyboard to ensure that the changes are working as expected. Press the remapped key and see if it performs the new function.
- Utilize Layers for More Options: VIA also allows you to set up multiple layers, meaning you can have different functions for the same key depending on the active layer. This feature is especially useful for users who require a range of functions for gaming or specific applications.
How to Create a Macro on VIA?
Creating keyboard macros in VIA is a convenient way to automate repetitive tasks or simplify complex actions. Macros can be used to automate anything from typing frequent phrases to performing gaming shortcuts. In VIA, you’ll find the Macro section under the Configure tab, which provides all the tools you need to set up powerful commands.
Create a Custom Key Combination Macro
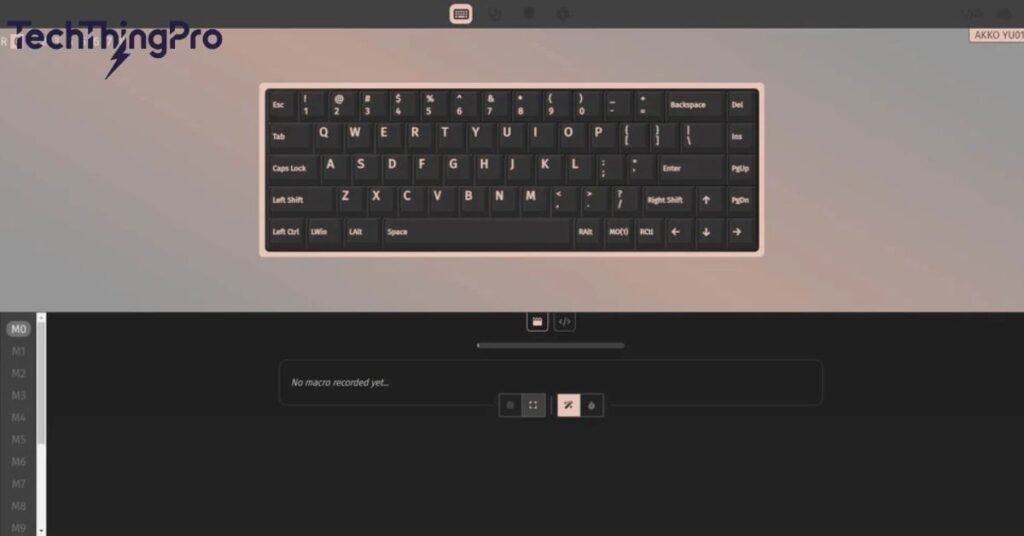
To create a custom key combination macro in VIA, navigate to the MACROS section under Configure. Once you’re there, click on FULLSCREEN and press RECORD KEYSTROKES. This feature captures each keystroke in sequence, which you can then map to a single key.
When you’ve finished recording, hit SAVE CHANGES to apply the macro. This approach is perfect for automating quick shortcuts and complex sequences on your keyboard.
Create a Macro that Outputs Lengthy Text Strings
If you frequently type long text strings, like signatures or addresses, macros can help save time. Go to the MACROS section, select the angle brackets icon to input text, and type your desired content.
After clicking “Save,” assign the macro to a key in the Keymap -> Macro area. This will let you type the entire string with a single key press, simplifying repetitive tasks.
How to Use Different Layers?
Layers in VIA allow users to assign multiple functions to a single key, which is ideal for compact keyboards with limited keys. A layer can be customized to act as a different layout, providing specific functions for tasks like gaming or productivity.
For instance, Layer 1 can be a standard layout for typing, while Layer 2 includes shortcuts for media controls or application commands. Setting up media controls on VIA or creating task-specific layouts has never been easier, thanks to VIA’s flexible layer configuration.
Example: Creating Layer 2 for Controlling Music and Media Playback
When creating Layer2 for media controls, you can follow these steps.
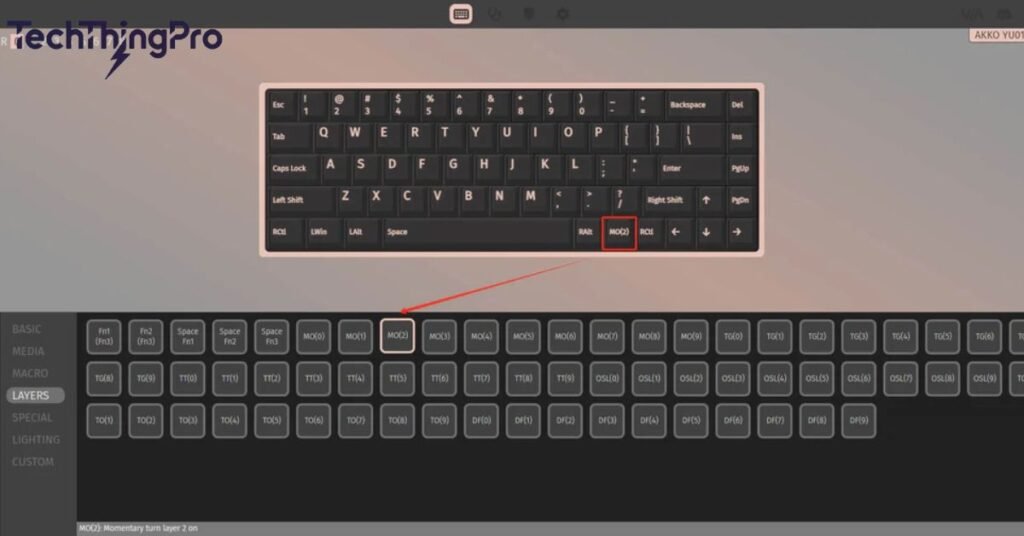
- Start by selecting Layer1 as your base layout. Click on the “KEYMAP” and navigate to “LAYERS.” This will allow you to view and edit your existing layers.
- Now, select Layer2 to customize your media controls. Here, you can remap keys according to your needs. For example, assign a key for Volume Up and another for Play/Pause. You can also set keys for Next Track and Previous Track.
By utilizing layers effectively, you can switch to Layer2 whenever you want to control music or other media playback without losing access to your primary typing functions. This flexibility enhances your keyboard’s usability, catering to various scenarios and user preferences.
Read 📖 More: How to Clean Your Mechanical Keyboard?
Terms Used in the Layers Section of VIA
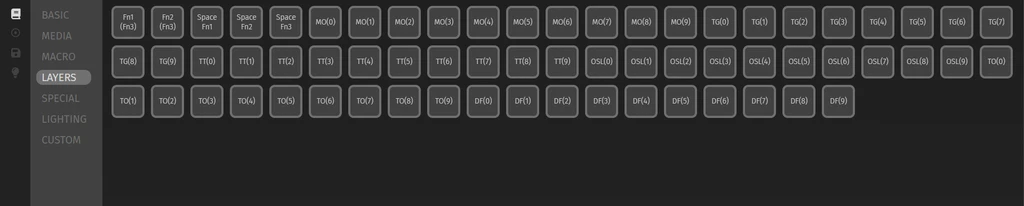
Understanding the terminology used in the layers section of VIA is crucial for effectively utilizing this powerful feature. Here are some key terms to know:
- Layer: A layer is a distinct layout configuration for your keyboard. Each layer can have different key assignments, allowing for multiple functions without changing the physical key layout.
- Momentary Layer (MO(n)): This layer activates only while the designated key is held down. It allows you to access alternate functions temporarily without permanently changing the key’s main function.
- One Shot Layer (OSL(n)): A one-shot layer remains active for a single keystroke. Making it easy to access additional functions without needing to hold down a key.
- Toggle Layer (TG(n)): This layer allows you to toggle between two layers with a single key press.
- Toggle Function (FN1): This designates a function layer, allowing users to access additional commands or shortcuts by pressing a specific function key.
- Default Layer (DF(n)): The default layer is the one that is active when the keyboard is powered on. Users can configure this layer to ensure essential functions are always accessible.
- Toggle and Momentary Layers (TG and MO): Both layers allow users to switch functionalities based on key presses, providing dynamic ways to adjust key functions as needed. This feature enhances the keyboard’s versatility, allowing users to tailor it to their specific requirements.
These terms form the backbone of understanding how layers work in VIA, enabling users to create highly customized keyboard layouts that fit their personal and professional needs.
Conclusion
VIA makes it easy to customize your keyboard for any purpose, whether you’re gaming, working, or just enjoying music. By understanding how to use layers, remap keys, and create macros, you can transform your keyboard into a powerful tool tailored to your needs.
With just a few simple steps, you can enhance your productivity and gaming experience. So, dive into the world of VIA, and start personalizing your keyboard today for a more enjoyable and efficient typing experience.

Lily Watkins is an experienced tech writer specializing in the latest trends and innovations. She is passionate about making complex technology accessible and shares her insights on TechThingPro.com.